What is No. Series Relationship?

I got surprised when i discovered that so many people working in Navision for quite some time doesn't understand No. series Relationship feature.
So what is No. Series Relationship?

Say you want to generate different invoice nos based on to where (geography) you are selling your service / material. So your domestic sales can have invoice nos which is different from invoice nos of export sales.

Now to implement the above feature, you need to use at least 2 no. series for invoice numbering? But in Sales & Receivables Setup's Numbering tab, you have provision of mentioning only one no. series for Sales Invoice nos. how to resolve this?

You can go for some customisation or simply use the No. series relationship.

No. Series Relationship is a feature in Navision which helps you to group multiple no. series together and use it for one document no. Take an example of a sales Invoice. This feature will make 2 (or more) no. series related to each other and both can be used for the sales invoice nos.
Lets do it in Navision.
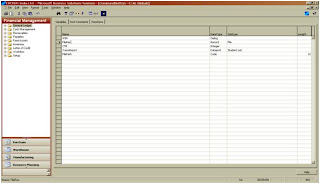
Create 2 no. series S-INV and S-INV EXP. First one for the domestic Sales & Second one for Export Sales.

Now relate the second no. series (S-INV EXP) with the first one with no. series relationship. To do that, select the seclect the S-INV in no. series window and click on the menu button series -> Relationships. Select the second no. series (P-INV EXP) in this window. Close it.
Your relationship between the 2 no. series is done. Now to use these no. series for sales invoice nos, you need assign it to sales & Receivables Setup.

Open Sales & Receivables Setup and go to the numbering tab. Choose the first no. series (P-INV) in the Invoice Nos.
Now you are ready to use both the no. series to generate the Sales Invoice nos. To test it -
Open the sales Invoice Window (Sales & Marketting -> Order Processing -> Invoices) and press F3 to create a new Sales Invoice. Don't tab away from the no. field. Now click on the assist edit button (the 3 dot button) next to No. field and you will find system is suggesting both the no. series to you. Select any one series (depending on what type of Sales invoice - Domestic / Export you are creating) and a new no. document no will be generated.
So, you have the option of using 2 no. series (or more) for one single document no. You can extend this functionality further by automating the selection of no. series own the basis of USER ID.
Experiment on it. See you in next post.

Disabling F4 - Stopping inadvertent Delete

Can we disable the F4 function button in Navision?

Few years back, I had a situation in one of my implementation, where users used to delete the sales order inadvertently by pressing F4 (Their intention was to create a new order by pressing F3).

Now how to stop it. I had solved it in a very simple way by creating a new dummy menu item in one of the menu button present in the order window and assigning F4 as the shortcut key to that menu item. It just overridden the default F4 functionality (delete function). Here is how i did it -


Open the sales order form (Form 42) in design mode. Add a new menu item to the menu button 'Order' present in that form. Caption it as 'Dummy' and assign the shortcut key F4 to it.

Don't write any code for this menu item. So nothing will happen if somebody clicks on it.
Now if somebody press F4, system calls that menu item 'Dummy' instead of default delete call and nothing happens for F4. And your default F4 is disabled.
Do you have a better solution? Do write to me.

Inline Editing - Making your Chart of Account ineditable and Editable at the same time

After a long holiday, i am back. Will discuss about an wonderful property named 'InlineEditing'

Chart of account is a window where your list of accounts is displayed. The same window is used to create a new account as well as finding a particular account (you are looking for analysing it).

Now in Navision, in any in editable window, you can simply start typing in any text and system opens the search box to search that text. But as the Chart of Account is editable (its the entry window), if you start typing something intending to search for it, you can inadvertently overwrite any field in this window. And users do this mistake quite often.

Can we arrange something whereas the system will not allow you to edit this window at the first instance but will allow you to insert a new account if intended?

Yes, you can achieve this using the 'InlineEditing' property. Use this property to force the user to click in the table box or press F2 to begin editing the text inside the table box. In other words once this property is turned on, no editing will be allowed when the form is opened. The user must click on an active editable control, press F2 when an editable control is in focus, or choose to insert a new record to begin editing. So if the user start typing in something immediately after the window is opened, the search function (window) will open and no text will be overwritten by mistake.
This particular property belongs to the Table box. The table box is nothing but the control in any tabular form which displays the different fields from a table. Let do it -
Open the form 16 (the chart of account window) and select the tablebox control.
Go to the property of the tablebox and find out the property 'Inlineediting'.


Make it true (Yes). Save the form.
Now reopen the chart of account and see whether it is editable in the first instance or when the form is opened. You will find the you need to click on any field or press F2 to edit it. Otherwise, if you start typing in any text, the search window opens immediately.
Note: You can also set this property dynamically in the runtime depending different criteria.
Hope this serves the purpose of making the chart of account in editable and at the same time, he
same window can be used to edit and insert record.
See you in next post.

AutoCalcField - What's that?

There are so many properties and functions available in Navision that its impossible to learn them completely in few years. Some of them are complex but most of them are simple and we simply unknowingly use them.

You would have been amazed knowing some of the properties which you use quite regularly but never bothered about knowing them. In this series of posts, we will try to under few of them. Today we will start with 'AutoCalcField'

You all know that if you display a flow field onto a form or a report, the system calculates the flow field value automatically and displays it. Do you know why system behaves like this? Just because of the property 'AutoCalcField'.

This simple property is related to any control onto a form or a report which displays a flow field. In other words, you can change this property in those controls whose source expression is a flow field.

Why we don't really notice them? Because 'Yes' is the default value for this property. If you turn it to 'No', the control simply will not calculate the flow field value automatically.

To check it out, open the Vendor card (form 26) in design mode and go to the property of the field "Balance (LCY)". You will find, the AutoCalcField property is set to 'TRUE' by default. You can change it to 'No' and see whether this field is anymore displaying the Vendor Balances or not.


Good Luck.

See you in Next property :)

Sequential Import of Multiple files into Navision Using Dataport

Can you import multiple files sequentially using Navision dataport?

Say you will put all the files to import into Navision in a folder and one navision dataport will import all the files one by one into Navision.

Here is how I have done it –

Created a new form and put a text box where user can mention the folder path from where the files will be imported. Also put a command button which will start the import process clicked.


Took the following variables in C/AL Globals –


WIN Dialog Type -> to display the progress of import
FileRec Record type -> referenced to virtual table ‘File’
CTR Integer type -> to count the number of files imported
TransImport Dataport type -> referenced to a dataport which will be run repeatedly depending on number of files present in the folder
FilePath Code type -> to store the file path of the folder

Also took a text constant for displaying the import progress in the dialog box ‘WIN’

Text50000 Importing File #1#####################\Count of File #2#####

Once the definition of variables are done, write the following code in the OnPush trigger of the command button –

ImportButton - OnPush() <--------- This is the trigger
WIN.OPEN(Text50000); // opening the dialog box to display the import status FileRec.SETRANGE(Path,FilePath); // Accessing the folder path mentioned by the user and stored in the ‘FilePath’ variable.
FileRec.SETRANGE("Is a file", TRUE); // Excluding the sub folders (if any) present in that folder.
IF FileRec.FINDFIRST THEN BEGIN // Ensuring that at least 1 file is present in the folder and pointing the instruction pointer to the first files in the folder.
REPEAT // Starting the loop to read files one by one
CTR += 1; // Capturing the file count
WIN.UPDATE(1,FileRec.Name); // Displaying file name in the dialog box.
WIN.UPDATE(2,CTR); // Displaying file counter in the dialog box.
CLEAR(TransImport); //Clearing the previous instance of the dataport
TransImport.FILENAME := FileRec.Path + '\' + FileRec.Name; // Sending the file name with the file path to the dataport.
TransImport.RUNMODAL // Running the dataport.
UNTIL FileRec.NEXT = 0; // Loop condition till all the files in the folder is read.
END;
MESSAGE('Import Done'); // Informing user that import is complete
WIN.CLOSE; // Closing the dialog box
Note: Your variable name can be different and you need to adjust your code as per your variable definition.

Now run the form and enter the folder path where your files to be imported are stored and click on the button ‘Import’. This will start the import process and will continue till all the files from the folder is imported into the database.

You can automate the same with the help of timer trigger of the form or using an application server. Will discuss the process of automating it in our future discussion.

All the best. Try it.

Have you migrated your Navision to SQL Server 2005 recently

Very recently Nisheel Poddar - IT head RKHS, migrated his Navision server from SQL Server 2000 to SQL Server 2005. Can you imagine what problem he has faced?
His users are unable to change their own password using Tools > Security > Password.
Checked with few more people who has migrated to SQL Server 2005 and surprised to find that everybody is having the same problem and they are solving the problem simply by assigning the dbowner role to their general users.
Dangerous. Don't you think?
Nisheel poddar was not satisfied and searched for solutions. What solutions we found you know?
In SQL Server 2000, we used to give the following roles to users while doing the user mapping to any Navision database:
1. Public (by default this is assigned to all users)
2. db_dataReader
3. db_datawriter
These 3 roles are enough for a generic user to use Navision functionlity. Even this gives you the permission to change your own password using Tools > Password.
Here you mention your old password and assign a new password.

But when you migrate to SQL Server 2005, The same roles assigned to users does not allow them to change to their own password. When your users tries to change it, they will see the following error -

"The following SQL Server error(s) occurred:
15151,"42000",[Microsoft][ODBC SQL Server Driver][SQL Server]Cannot alter the login 'nisheel', because it does not exist or you do not have permission.

SQL:{CALL [sp_password](?, ?)}"

When you change your password from Navision client, the stored procedue 'sp_password' is called and the necessary permission to execute this stored procedure was included in 'Public' role of SQL Server 2000.

But the same permission is no longer associated with 'Public' role in SQL Server 2005. And that's why you will have the problem in changing the password. And you are taking a dangerous decision of assigning 'dbowner' role to your users.

To resolve it without assigning the 'dbowner' role, you need to explecitely assign a specific permission to your 'Public' Role (the permission having execute power of Sp_password). Follow the instruction below

1. Follow the standard procedure of creating a new users and mapping them to a your Navision database. While User Mapping, assign the normal roles Public, db_datareader, db_datawriter.


2. Now, assign the permission 'Alter any Login' to your 'Public' role. Select the Server and open its property window.


Select 'Permission' page in left hand pane and select 'Public' role in the right hand pane. Scroll down and find the 'Alter Any Login' permission. Grant this permission to 'Public' Role.


Do remember, you need to be System Administrator to do the above setup.

Now try and see whether your users are able to change their own password or not. They will be able to do that.

This may not be the best possible solution and you are welcome to send your suggestion or any other solution to it.

Do send me your comments and suggestions.

Reblog this post [with Zemanta]